Thursday, November 3, 2011

All Purpose Camping - Surfing - Hunting Ute.


 2000 Courier 4wd Intercooled Turbo Diesel. 
The ute did not come with the canopy. I adapted this from a 4wd dual cab Hilux a mate had for sale in his car yard but couldn't sell with the canopy attached. Cost? A carton of stubbies!

 Surfing trip set up with part of an old canvas tent tied to convienent tree.

Set up for hunting or if I am staying a couple of days the tarp is rigged so I can drive out from under it by undoing 2 occy straps. I roll the swag forward and prepare and cook meals on the tailgate. Liam sleeps on the camp stretcher but usually not under the runoff from the tarp!

Interior showing canopy frame with canvas attached. Frame attaches to lip of ute tub with four blind nuts. Canopy is attached to ute tub with bungee cords on sides and rear and heavy duty press studs across front behind the cab. A mosquito net is attached to the frame and dropped around the swag when sleeping. My head is usually to the front of the canopy and with the tailgate down my feet are out in the weather unless I fit the tarp over the rear of the canopy which I usually do unless it's a quick overnight rest stop.

If it's a hot night the canopy side roll up for a cross breeze and the skeeta net keeps the mozzies at bay!


 The canvas comes off in a matter of minutes so it doesn't get soiled during hunting and the frame doubles as ideal support for spotlighting.

Gary feeds the magpie that blew out of it's nest and followed him!

Well that is my little setup done on the cheap. I would rather rough it a little and use the money for fuel and ammo!


When Deb and I go away we take the caravan but that is just too luxurious for hunting and can you imagine the state it would come back in?


Friday, November 5, 2010

Home Modified Indian Mynah Trap

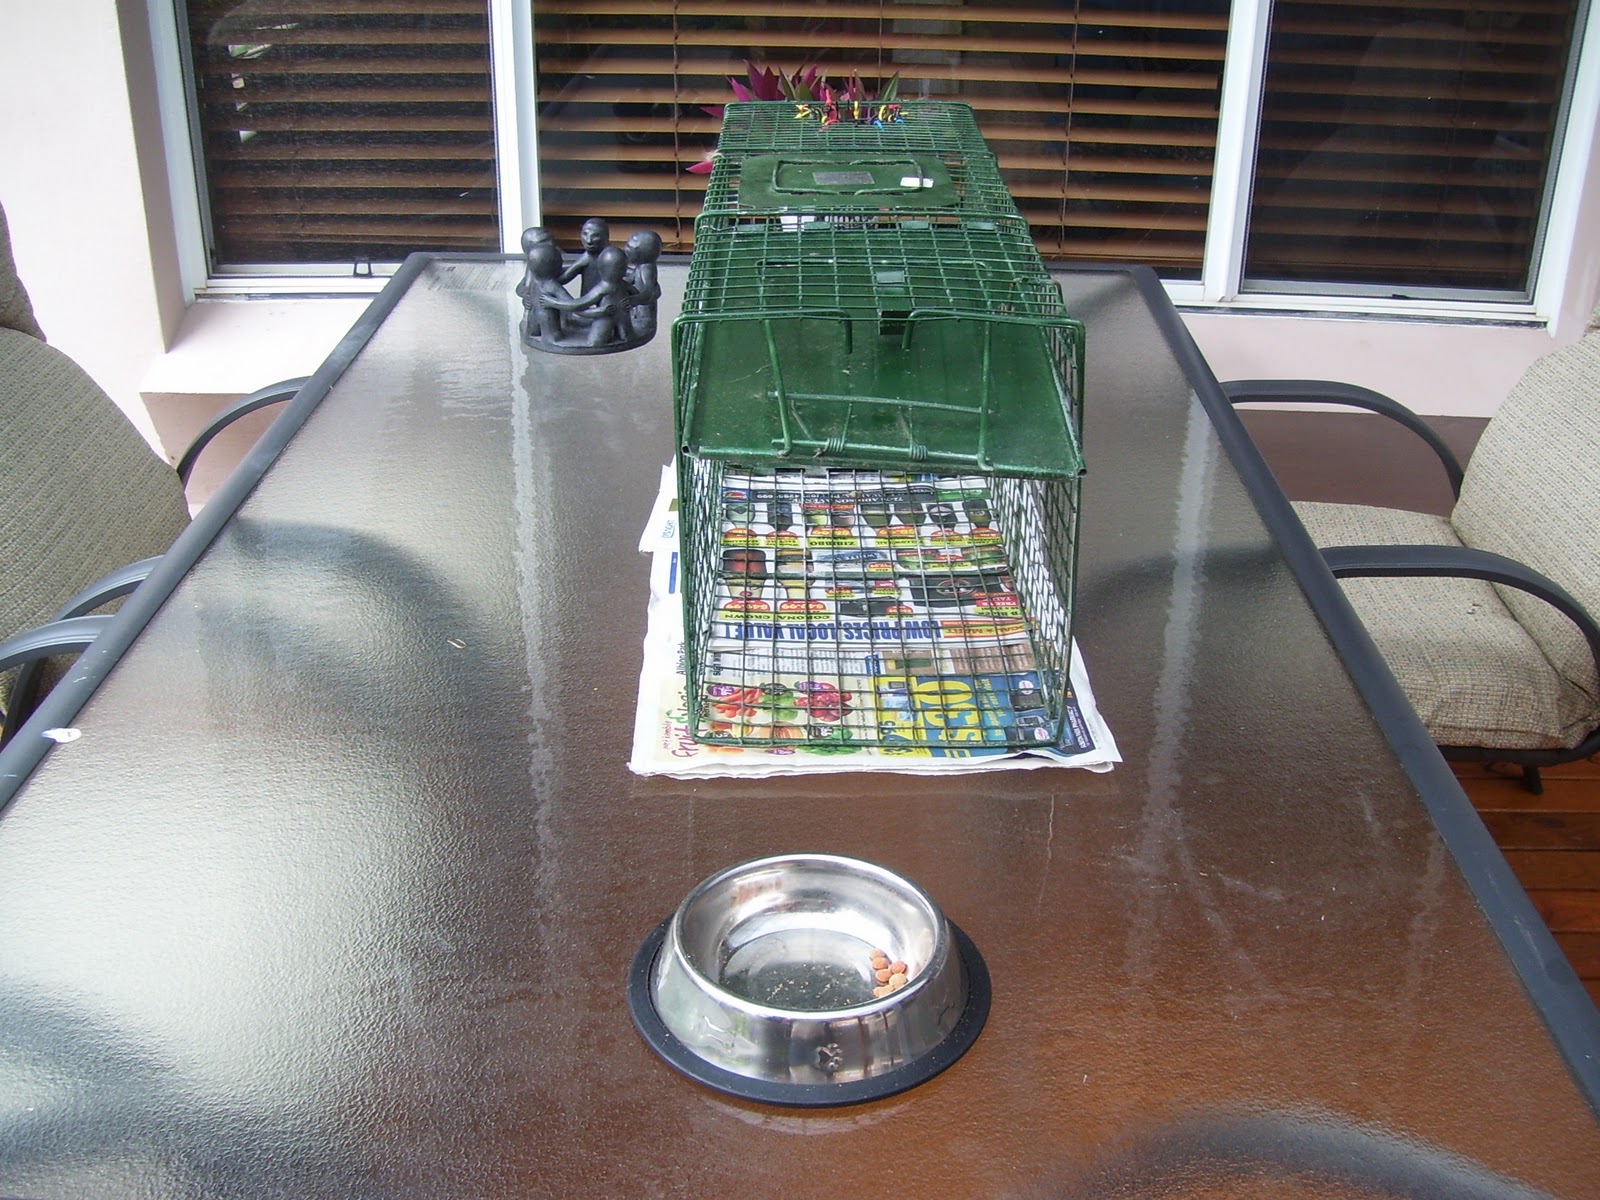
 The little buggers should enter stage right under the green trapdoor and continue down toward the dried dog food in the black container on the trigger plate.Once the bird starts to eat the vibrations will trigger the trapdoor to close rapidly. This will capture the first bird into the trap. This bird will stay in the trap and act as the caller for the rest (hopefully). There will be water in the cage so the mynah will not suffer. I have put newspaper down because I am not partial to mynah faeces on the BBQ table!

 Top view.

 As the trapdoor is now closed there has to be another way into the cage for other mynahs. This is thru the tunnel on the top of the cage. Mynah birde are not adverse to pushing thru small openings as they do this all the time to nest in roofs and hollow trees. The caller bird will bring them in and they will land on the top of the cage and see the food thru the tunnel and enter the cage. The tunnel stops about 100mm above the floor of the cage and is fashioned in such a way they cannot leave via the tunnel.


This is a view of the trapdoor and trigger mechanism at the front of the trap. The trigger mechanism was filed down to make it, as we say in hunting parlance, "a hair trigger". This was done because the cage was originally a possum trap and possums are a lot heavier then mynah birds and the lighter mynah bird would not trigger the trapdoor without this modification. This trap originally cost $79.00 at FX Larkin at Unanderra a few years ago.

A "proper" mynah trap retails for around $300.00 on the internet. You would have to hate the buggers a lot to spend 300 bucks to kill 'em I reckon!


Here is an end view of the trap with the dog food bowl that the mynahs are used to eating out of. This, hopefully, will lure them in and when the couple of biscuits are devoured the mynahs will enter the trap.The trap only went into use today so I will keep you posted on its success. Cruelty is out of the question and Indian Mynahs must be euthanised humanely. A vet will usually help here. Wear gloves as they are filthy, lice and disease infested, savage little shits that will peck you!

Saturday, October 23, 2010

DAMPER PARMIGIANA

DAMPER PARMIGIANA

INGREDIANTS:    3 Level camp mugs self-raising flour
                               2 heaped tablespoons grated parmisan cheese
                               2 heaped tablespoons sugar
                               1 level teaspoon salt
                               1 cup of water

METHOD:    Wash your bloody hands first!

Mix the exact quantities of dry ingredients in the bowl with a spoon and make a crater in the center before adding the exact amount of water. This is critical as any more or any less will make the mix too dry or too wet.

Initially mix with the spoon and finally mix by hand in the bowl until all of the ingredients are homogenous and the lump of dough has been flattened and folded many times to get uniform disposal of moisture content.

Smoothly mould the dough into a flattish disc shape about the size of the camp oven. The inclusion of the cheese produces a golden brown damper if not overheated and is a welcome change from that slightly bland standard damper taste.

Put about 5mm of dry flour in the bottom of the camp oven prior to the damper going in and the damper will lift out with very little mess. Pre warm the oven in the sun or near the fire and keep it there with the damper in it for at least 30 minutes before cooking. This will allow the damper to rise.

Cook the damper using coals in a shallow depression, using twice as many coals on the lid as underneath. The shallow depression can be dug with a shovel about half as large again as the camp oven and coals put in the bottom. Don’t use too many coals or the damper will burn and cooking time will usually be 45 to 60 minutes.

Camp Oven Cooking

Camp Oven Moroccan Roast Goat With Mint & Garlic
Or You Could Use Lamb!

Ingredients:      1 x 2 kg (approx) boned out *young goat leg.
                        4 cloves garlic – finely chopped
                        Handfull chopped mint leaves.
                        1 Tablespoons salt
                        Master Foods Moroccan herbs.
                        Pepper grinding to taste.
                        1 x can diced tomatoes.
                        1 x large carrot – long diced
                        2 x spuds – sliced
                        1 x sweet potato – cubed
                        4 or 5 pieces cubed pumpkin
                        1 x stick celery – small dice
                        1 x large onion – finely chopped
                        Juice of 1 lemon
                        3 x Tablespoon olive oil


Trim any fat off the goat leg open it out, flesh up. Season flesh side with garlic, mint, a good shake of Moroccan herbs, pepper and salt. Roll up and tie firmly with butchers twine or brown string, at a pinch you could use fencing wire! Splitpin said he once used fish hooks!!!

Pre-heat the camp oven, with trivet in, oil trivett and cover with sliced spuds. Place the goat leg on the spuds. Pour the lemon juice over the goat leg and drizzle the olive oil over it.

Place the rest of the veges around the goat leg and pour the can of tomatoes over the veges and season the lot with the Moroccan herbs.

Place camp oven on a good bed of coals and place a shovel full of hot coals on top of camp oven.

Sit back and have a few beers and test meat after 1 hour with skewer if the coals are nice and hot. If it is windy it will take longer to cook. A good idea if it is windy is to dig a cooking pit at least as deep as the camp oven. If clear liquid comes out when you skewer the goat leg, she’s cooked mate so take it off the coals or it will overcook. If blood comes out when you skewer it, she’s raw! More time needed.

When cooked, the goat should be pink on the inside. Now where have I heard that before? A nice sauce can be made with the juices left. Skim any fat off the top and make into a gravy with an instant gravy mix like Gravox.

This dish goes marvelously with Parmigana Damper, beer and/or red wine!

*A young goat is preferable, don’t shoot an old billy or a female in season. Too many hormones and too gamey! Hang the leg, wrapped in cheesecloth, for a day in the shade after the kill to help temper the gamey taste.      

Monday, April 26, 2010

Blast From the Past - Falling off ST1100 Honda

Before we got into caravanning Spanner and I toured on a motorcycle. On this occasion Spanner stayed at home working hard to keep me in the motorcycles to which I was accustomed!

I decided to go up the North Coast and visit my brother Roscoe. Here is a video clip starting off with a ride across the Harbour Bridge early on the first morning then heading up Thunderbolts Way.

Language warning at end of clip!


Friday, March 5, 2010

Surfdog Slays it at Potato Point!

It'll go faster in the water Dad!


Yeah! Cowabunga, here I go!


Hahahahahahahaah! Wipeout!!


Where'd that bloody board go?


Shoulda worn me wettie!

Thursday, February 18, 2010

Solar Powered Vent Fit to Jayco Sterling


Four years ago I fitted one of these solar vents in the skylight of our bathroom and another one in the toilet of our home. It is not a difficult job and well within the scope of your average handyman - if there is such a creature!

The vents are still working gangbusters and start in the morning before the sun hits them. I figured one of them fitted to a roof hatch in the Sterling would circulate the air and get rid of any stuffiness if the van was not used for a period of time.

The item is a Sunvent SVT-212S and was purchased on the net. I didn't want one with a battery that I had to turn on and off so the stainless Sunvent filled the bill. Sol shines and Sunvent vents! Actually the vent works even with medium cloud cover.


I decided the easiest way to fit it was to remove the roof hatch and do the fit on the workbench. This would leave a hole in the van roof and we hoped it wouldn't rain! Removal is pretty simple with two hinge pins and two lever catch pins to be removed. This was done from inside the van.

Nice blue sky and no sign of rain so the fit begins.

The hatch has two layers of perspex about 12mm apart and the plan was to mark the opening using the rubber seal as a template and drill a 10mm hole to start the cut.

I then cut out the opening using a jigsaw with a very fine blade. A word of warning here. Don't stop halfway through the cut as the perspex melts as it is cut and when you stop it solidifies the blade to the job! The opening was cut undersize and then opened out to the correct size with a mini die grinder. Perspex residue gathers between the two layers and this was washed out with detergeant and water and the hatch dried in the sun.


Then I had a look outside and decided I needed to sharpen the footwork!
Them's rainclouds Shooter!


The solar vent was installed in the opening with a smear of glazing silicone on either side of the rubber seal. There are three stainless self tappers to fasten the solar vent to the hatch and about completes that side of the install. There is a slide over type of plastic gasket that hides the cut on the inside.

Then it was time to re-install the hatch. I had removed the hatch from inside the van but decided it would be quicker and easier to do the install from outside. Maybe not safer, but quicker! Fibreglass van roofs are slippery and driveways hard!

The whole operation took about 1 1/2 hours and the vent is working beautifully. Below are two pics showing the finished job.


And the dark clouds blew away without a drop of rain falling!